Home Blog Page 9

How to build a gaming Mac?

0

When it comes to gaming, the Mac platform is often overlooked in favor of Windows-based systems. However, with the right hardware and software configuration, you can build a gaming Mac that can rival any high-end gaming PC. In this guide, we’ll walk you through the process of building a gaming Mac from scratch, including hardware selection, software installation, and performance optimization.

Step 1: Choose Your Hardware

The first step in building a gaming Mac is selecting the right hardware components. Here are the key components you’ll need to consider:

CPU: The CPU is the brain of your computer, and it’s essential to choose a high-performance model for gaming. Apple’s Macs typically come with Intel or Apple-designed CPUs, and you’ll want to choose a model with at least four cores and a clock speed of 3 GHz or higher.

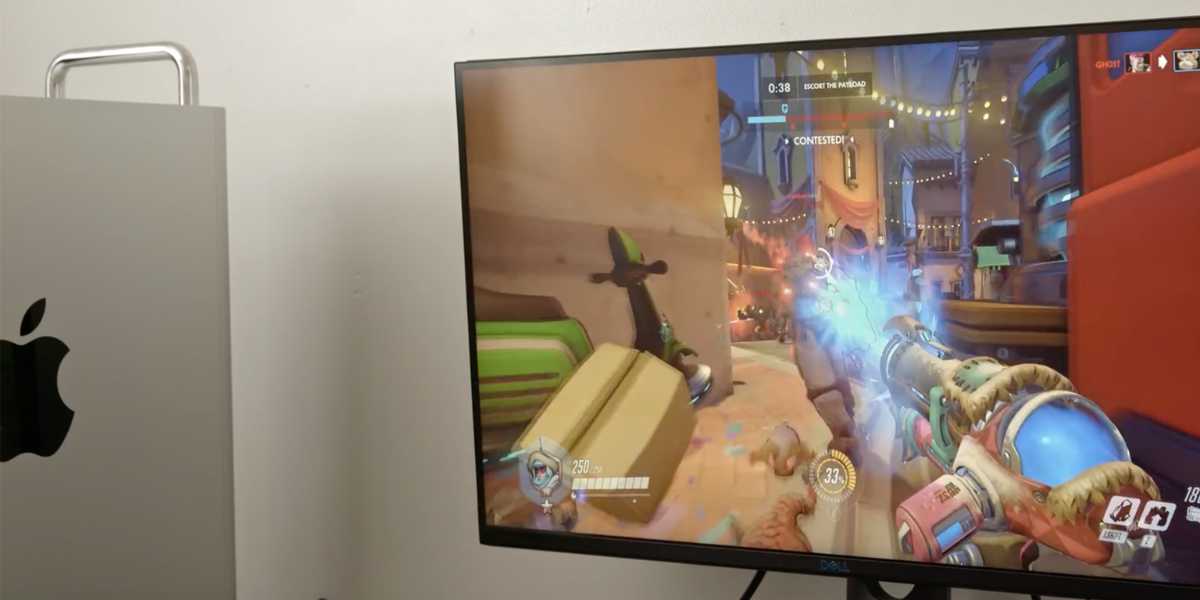
GPU: The graphics card is the most critical component for gaming performance, and Apple’s integrated GPUs are not up to the task. You’ll need to install a dedicated graphics card, and there are several options available, including Nvidia and AMD models. Look for a card with at least 4GB of VRAM and a high core clock speed.

RAM: Gaming requires a lot of memory, and you’ll want at least 16GB of RAM for optimal performance. Look for DDR4 memory with a high clock speed for the best results.

Step 1: Choose Your Hardware

Storage: You’ll need a fast and reliable storage solution for your gaming Mac, and an SSD is the best option. Look for a PCIe-based NVMe SSD with at least 500GB of storage capacity.

Cooling: Gaming can generate a lot of heat, and it’s important to choose a cooling solution that can keep your components running at optimal temperatures. Consider installing liquid cooling or high-performance air cooling to keep your system cool.

Step 2: Install macOS and Boot Camp

Once you’ve assembled your hardware components, it’s time to install the macOS operating system. You can download the latest version of macOS from the Apple website and create a bootable USB drive using a tool like DiskMaker X. Once you’ve created the USB drive, plug it into your new gaming Mac and follow the on-screen instructions to install macOS.

Next, you’ll need to install Boot Camp, which allows you to run Windows on your Mac. Boot Camp is included with macOS, and you can find it in the Utilities folder. Follow the on-screen instructions to partition your hard drive and install Windows.

Step 3: Install Gaming Software

With Windows installed on your gaming Mac, it’s time to install the gaming software you’ll need to play your favorite games. Here are the key software components you’ll need:

Steam: Steam is the largest gaming platform on the planet, and it’s essential for any serious gamer. Download and install Steam, create an account, and start downloading your favorite games.

Graphics Drivers: To ensure optimal performance from your graphics card, you’ll need to install the latest graphics drivers. Visit the Nvidia or AMD website and download the latest drivers for your card.

Game Optimizers: There are several game optimization tools available that can help you fine-tune your gaming performance. Popular options include Razer Cortex and GameGain.

Step 4: Optimize Your Gaming Performance

Once you’ve installed all the necessary software, it’s time to optimize your gaming performance. Here are some tips to get the most out of your gaming Mac:

Adjust Your Graphics Settings: Every game has its own graphics settings, and it’s essential to find the right balance between visual quality and performance. Start with the recommended settings and tweak them to your liking.

Overclock Your GPU: If you’re comfortable with overclocking, you can boost your GPU performance even further. Use a tool like MSI Afterburner to overclock your graphics card and adjust the clock speed and voltage settings.

Monitor Your Temperatures: As mentioned earlier, gaming can generate a lot of heat, and it’s important to keep an eye on your temperatures to avoid overheating. Use a tool like HWMonitor to monitor your CPU and GPU temperatures.

Close Background Applications: Running too many applications in the background can slow down your gaming performance. Close any unnecessary applications before launching your game.

Step 4: Optimize Your Gaming Performance

Upgrade Your Components: If you’re not satisfied with your gaming performance, consider upgrading your hardware components. You can upgrade your RAM, graphics card, or even your CPU to boost your performance.

Step 5: Maintenance and Upkeep

To ensure your gaming Mac stays in optimal condition, it’s important to perform regular maintenance and upkeep. Here are some tips to keep your system running smoothly:

Clean Your Components: Dust and debris can accumulate on your hardware components over time, which can lead to overheating and performance issues. Use compressed air or a soft brush to clean your components regularly.

Update Your Drivers: It’s important to keep your graphics card and other hardware drivers up to date to ensure optimal performance. Check for updates regularly and install them as needed.

Defragment Your Hard Drive: Over time, your hard drive can become fragmented, which can slow down your system. Use a tool like Disk Utility to defragment your hard drive periodically.

Backup Your Data: Gaming can be a data-intensive activity, and it’s important to backup your data regularly to prevent data loss in the event of hardware failure. Consider using a cloud backup service or an external hard drive to backup your important files and data.

Step 6: Troubleshooting

Even with the best hardware and software configuration, issues can still arise while gaming on your Mac. Here are some common troubleshooting tips to help you diagnose and fix any issues:

Check Your Internet Connection: If you’re experiencing lag or slow performance while playing online games, check your internet connection. Make sure you have a stable and fast internet connection and try restarting your router if necessary.

Update Your Software: Outdated software can cause performance issues or even crashes while gaming. Make sure you have the latest updates installed for your operating system and game.

Check Your Hardware Components: Overheating or hardware failures can cause crashes or other issues while gaming. Check your hardware components, like your graphics card and CPU, to make sure they’re running smoothly and not overheating.

Adjust Your Graphics Settings: If you’re experiencing low frame rates or other graphics-related issues, adjust your graphics settings in the game. Lowering the graphics quality can often improve performance.

Conclusion

Building a gaming Mac can be a rewarding experience, and with the right hardware and software configuration, you can enjoy smooth and immersive gaming experiences. Start by selecting the right hardware components, installing macOS and Boot Camp, and installing the necessary gaming software. Once everything is set up, don’t forget to optimize your gaming performance to get the most out of your gaming Mac. Happy gaming!

How to Factory Reset PC?

0

Sometimes, when your computer is running slow, experiencing frequent crashes, or plagued with malware, the best solution is to perform a factory reset. Resetting your computer to its original factory settings will remove all your personal files and installed programs, leaving your computer in the same state it was when you first bought it. In this article, we’ll take you through the step-by-step guide on how to factory reset your PC.

How to Factory Reset PC: A Step-by-Step Guide

How to Factory Reset PC: A Step-by-Step Guide

Step 1: Backup Your Important Data

Before performing a factory reset, make sure to backup all your important data, such as documents, photos, videos, music, and any other files you don’t want to lose. You can use an external hard drive, cloud storage services like Google Drive or Dropbox, or a USB drive to backup your files. This step is crucial, as you won’t be able to recover any of your data once you perform a factory reset.

Step 2: Disconnect External Devices

Disconnect all external devices, such as printers, scanners, speakers, headphones, and USB devices, from your computer. This is important to ensure that the reset process doesn’t get interrupted by any external devices.

Step 3: Access the Recovery Environment

The process of accessing the recovery environment varies depending on your computer’s make and model. However, most computers have a built-in recovery partition that can be accessed by pressing a specific key during startup. Common keys to access the recovery environment are F11, F12, Esc, or Del. If you’re not sure which key to press, refer to your computer’s documentation or check the manufacturer’s website.

Step 4: Choose Your Reset Option

Once you’re in the recovery environment, you’ll be presented with two options: “Keep my files” or “Remove everything.” If you choose the “Keep my files” option, your personal files, such as documents, pictures, and music, will be kept, but all the installed programs and settings will be removed. If you choose the “Remove everything” option, all your personal files, installed programs, and settings will be removed, and your computer will be reset to its original factory settings.

Step 5: Start the Reset Process

After you’ve chosen your reset option, click the “Reset” button to start the process. The reset process may take several minutes to complete, depending on your computer’s specifications. During the reset process, your computer may restart several times, and you may see a progress bar indicating how much time is remaining.

Step 6: Reinstall Your Programs

Once the reset process is complete, you’ll need to reinstall all the programs you previously had installed on your computer. This includes your antivirus software, web browser, productivity suite, and any other software you need. You can either download the programs from their respective websites or install them from a backup disc or USB drive.

How to Screen Record on PC?

Step 7: Restore Your Backed-Up Data

After you’ve reinstalled your programs, you can now restore your backed-up data. This step is crucial, as it ensures that you don’t lose any of your important files. You can either copy the files back to your computer’s hard drive or use a backup and restore software to transfer the files.

Step 8: Update Your Operating System and Drivers

After performing a factory reset, it’s important to update your operating system and drivers to ensure that your computer is running smoothly and securely. You can check for updates by going to your computer’s settings or control panel and selecting “Windows Update” or “Device Manager.” Make sure to install all the available updates to keep your computer up to date and secure.

How to Factory Reset PC – Conclusion

Performing a factory reset is an effective way to fix common computer problems, such as slow performance and malware infections. However, it’s important to backup your data before resetting your computer, as the process will erase all your personal files and installed programs. Once you’ve reset your computer, you’ll need to reinstall your programs and restore your backed-up data. It’s also important to update your operating system and drivers to ensure that your computer is running smoothly and securely.

In addition to the steps outlined above, there are a few other things to keep in mind when performing a factory reset. Firstly, make sure that your computer is fully charged or connected to a power source during the reset process, as interruptions or power failures can cause the reset to fail. Secondly, make sure that you have your Windows license key or product key handy, as you may need to enter it during the reset process.

In some cases, your computer may have a recovery disc or USB drive that can be used to perform a factory reset. If your computer came with a recovery disc or USB drive, make sure to follow the manufacturer’s instructions on how to use it to perform a factory reset.

Why Is My PC So Slow?

In conclusion, performing a factory reset is a useful solution to fix common computer problems. By following the steps outlined in this article, you can reset your computer to its original factory settings, reinstall your programs and restore your backed-up data. Just remember to backup your data, disconnect external devices, and update your operating system and drivers after the reset process is complete.

It’s worth noting that a factory reset is not always the best solution for every computer problem. If your computer is experiencing hardware issues, a factory reset won’t fix those problems. Additionally, if your computer has important files that you don’t want to lose, it’s always best to try other solutions before resorting to a factory reset.

Some other solutions to try before performing a factory reset include running a malware scan, freeing up disk space, uninstalling unnecessary programs, updating drivers, and disabling unnecessary startup programs. These solutions can often improve your computer’s performance without the need for a full factory reset.

In some cases, a factory reset may be necessary if your computer is severely infected with malware or has become unusable due to software issues. However, it’s important to remember that a factory reset should always be a last resort, as it will erase all your personal files and installed programs.

In conclusion, a factory reset can be a useful solution to fix common computer problems, but it should be approached with caution. Make sure to backup your data, disconnect external devices, and update your operating system and drivers after the reset process is complete. If possible, try other solutions before resorting to a factory reset, as it can be a drastic solution with significant consequences.

How to Screen Record on PC?

0

Screen recording is a useful feature that allows you to capture whatever is happening on your computer screen. Whether you want to create a tutorial, record a video call, or capture a gaming session, screen recording can come in handy. In this article, we will discuss how to screen record on PC.

Screen Record on PC

1. Choose a screen recording software

The first step is to choose a screen recording software that best suits your needs. There are many options available, both free and paid. Some of the popular ones include OBS Studio, Bandicam, Camtasia, and ScreenFlow. Each software has its own unique features and advantages, so it’s essential to choose one that meets your requirements.

2. Install the screen recording software

Once you have chosen a screen recording software, the next step is to install it on your PC. Most software is straightforward to install, and you can download them from the developer’s website or app store.

Screen Record on PC
Screen Record on PC

3. Launch the screen recording software

After installation, launch the recording software. Depending on the software, you may have to sign up or create an account to use it. Once you’re logged in, you can start using the software.

4. Select the screen area to record

Before starting the screen recording, you need to select the portion of your screen that you want to record. Most recording software allows you to select the entire screen or a specific window. You can also select a custom area by dragging the cursor around the screen.

5. Adjust the recording settings

Next, adjust the recording settings according to your preferences. These settings include video resolution, frame rate, audio source, and file format. You can choose the video resolution based on your screen size and select the frame rate that suits your recording needs. Similarly, you can choose the audio source for your recording, such as system audio or microphone audio, and adjust the volume levels. Additionally, you can select the file format for your recording, such as MP4 or AVI, depending on your needs.

Why Is My PC So Slow?

6. Start the screen recording

Once you’ve selected the screen area and adjusted the recording settings, you can start the recording. Most software has a record button that you need to click to begin recording. You can also use hotkeys to start and stop the recording, which can be more convenient.

7. Pause or stop

While recording, you may need to pause or stop the recording. Most software has a pause or stop button that you can use to pause or stop the recording. You can also use hotkeys to pause or stop the recording. It’s essential to pause or stop the recording when necessary to avoid recording unnecessary footage.

8. Edit the screen recording

After recording, you may need to edit the screen recording to remove unwanted footage or add effects. Most recording software comes with built-in editing tools that allow you to trim, crop, or add effects to the recording. You can also use third-party editing software such as Adobe Premiere or Final Cut Pro to edit the recording.

9. Save the screen recording

Once you’ve edited the screen recording, you can save it to your PC. Most software allows you to save the recording to a specific folder on your computer. You can also choose the file format and name the file according to your preferences.

10. Share the screen recording

You can upload the recording to video hosting platforms such as YouTube, Vimeo, or Wistia, or share it directly with your audience via email or social media. When sharing the recording, make sure you have the appropriate permissions and follow copyright laws.

In conclusion, it is a useful feature that allows you to capture whatever is happening on your computer screen. By following the steps outlined above, you can learn how to screen record on your PC and start creating your own content. Choose a recording software, install it on your PC, select the screen area to record, adjust the recording settings, start the recording, pause or stop the recording when necessary, edit the recording, save it to your PC, and share it with others. With these steps, you can create professional-looking  recordings and share them with your audience.

What is a PC?

Here are some additional tips to help you create high-quality screen recordings:

Create high-quality screen recordings

1. Make sure your computer has enough resources

Screen recording can be resource-intensive, so make sure your computer has enough resources to handle the task. Close any unnecessary programs and applications to free up resources and ensure a smooth recording.

2. Use a good microphone

If you plan to record audio along with your screen recording, it’s essential to use a good microphone. A poor-quality microphone can result in muffled or unclear audio, which can be frustrating for your audience.

3. Plan your recording

Before starting the recording, plan what you want to record and how you want to present it. Create an outline or storyboard to guide your recording and ensure that you cover all the necessary points.

Create high-quality screen recordings

4. Keep it short and concise

Try to keep your recording short and concise. Long recordings can be overwhelming and lose your audience’s attention. Stick to the essential points and keep your recording under 10 minutes, if possible.

5. Use visual aids

Visual aids such as arrows, highlights, and captions can make your screen recording more engaging and informative. Use them to draw attention to key points and emphasize important information.

By following these tips and steps, you can create professional-looking recordings that engage and inform your audience. Whether you’re creating tutorials, recording video calls, or capturing gaming sessions, recording is a powerful tool that can help you achieve your goals.

Why Is My PC So Slow?

0

If you’ve ever experienced the frustration of a slow PC, you’re not alone. A slow computer can be a major hindrance to productivity, not to mention a major source of frustration. In this article, we’ll explore some of the common reasons why your PC might be running slow and provide some tips to help you speed things up.

Hardware Issues

One of the most common reasons why your PC might be running slow is hardware issues. Over time, hardware components like your hard drive and memory can start to degrade, which can cause your PC to slow down. If you suspect that hardware might be the issue, you can try running diagnostic tools to identify any issues.

Why Is My PC So Slow? Check for Malware

Another common cause of a slow PC is malware. Malware is malicious software that can infect your computer and slow it down or cause other problems. If you suspect that your PC might be infected with malware, you can run a virus scan using your antivirus software. Be sure to keep your antivirus software up to date to ensure that it can detect the latest threats.

Why Is My PC So Slow? Check for Malware

Too Many Programs Running

If you have too many programs running on your PC, it can cause it to slow down. Every program that’s running on your computer takes up resources like memory and processing power, so if you have too many programs running, it can overwhelm your PC. If you want to speed up your computer, try closing any programs that you’re not using.

Startup Programs

When you start up your computer, there are usually a number of programs that automatically start up as well. These programs can slow down your computer’s startup time and cause it to run slower overall. If you want to speed up your PC, you can disable some of these startup programs. To do this, you can go to your task manager and look for the “startup” tab.

Fragmented Hard Drive

If your hard drive is fragmented, it can slow down your PC’s performance. Fragmentation occurs when files on your hard drive become scattered in different locations, making it harder for your PC to access them quickly. To fix this, you can run the disk defragmenter tool that comes with Windows. This will organize your files and make them easier for your PC to access.

Fragmented Hard Drive

Not Enough RAM

If your PC doesn’t have enough RAM, it can slow down your computer’s performance. RAM is the short-term memory that your PC uses to store data and programs that are currently in use. If you don’t have enough RAM, your PC will have to rely on your hard drive, which is much slower. To speed up your PC, you can try adding more RAM.

Outdated Software

Outdated software can also slow down your PC. Newer versions of software often come with improvements and optimizations that can make them run faster and more efficiently. If you’re running outdated software, you may want to consider updating it to a newer version.

Overheating

Overheating can also cause your PC to slow down. When your PC gets too hot, it can cause the CPU to slow down to prevent damage. If you suspect that your PC might be overheating, you can check the temperature using a tool like HWMonitor. You can also try cleaning out any dust that might be clogging your PC’s fans.

Why Is My PC So Slow – Conclusion

A slow PC can be a major source of frustration, but there are many reasons why your PC might be running slow. By identifying the root cause of the issue, you can take steps to speed up your computer and improve your productivity. Whether it’s hardware issues, malware, too many programs running, or outdated software, there are many things you can do to speed up your PC and get it running smoothly again.

Additional Tips to Speed Up Your PC

In addition to the common causes of a slow PC mentioned above, there are other things you can do to speed up your computer:

  1. Uninstall Unused Programs: Over time, you may accumulate a lot of programs that you no longer use. Uninstalling these programs can free up space on your hard drive and make your PC run faster.
  2. Clean Up Your Hard Drive: Your hard drive can become cluttered with temporary files, old downloads, and other unnecessary files. Use a disk cleanup tool to clean up your hard drive and free up space.
  3. Upgrade to an SSD: If you’re still using a traditional hard drive, upgrading to an SSD (solid-state drive) can make a big difference in your PC’s performance. SSDs are much faster than traditional hard drives and can make your PC run much faster.
  4. Disable Visual Effects: Windows comes with a number of visual effects that can slow down your PC’s performance. If you want to speed up your PC, you can disable these effects by going to the Performance Options settings.
  5. Upgrade Your Graphics Card: If you use your PC for gaming or other graphics-intensive tasks, upgrading your graphics card can make a big difference in your PC’s performance.
  6. Keep Your PC Clean: Dust and dirt can accumulate inside your PC, clogging up fans and causing your PC to overheat. Keep your PC clean by regularly dusting it out and cleaning the fans.

Why Is My PC So Slow – Final Thoughts

In conclusion, a slow PC can be a frustrating experience, but there are many things you can do to speed it up. By identifying the root cause of the issue and taking steps to fix it, you can improve your PC’s performance and productivity. Whether it’s hardware issues, malware, too many programs running, or outdated software, there are many solutions available to speed up your PC and get it running smoothly again. Follow the tips and suggestions mentioned in this article, and you’ll be well on your way to a faster, more efficient computer.

What is a PC?

0

Personal computers, or PCs, are ubiquitous in modern life. From work to entertainment, communication to creativity, PCs have become an essential tool for people of all ages and backgrounds. But what exactly is a PC? In this article, we’ll explore the basics of PCs, including their components, types, and uses.

Components of a PC

A PC typically consists of several key components, including:

  • CPU: The central processing unit, or CPU, is the brain of the computer. It performs calculations and controls the other components of the PC.
  • RAM: Random access memory, or RAM, is the temporary storage used by the PC to store data and instructions that are currently in use.
  • Storage: PCs use a variety of storage devices, including hard drives, solid-state drives, and cloud storage, to store data and programs.
  • Motherboard: The motherboard is the main circuit board that connects all the other components of the PC.
  • Graphics card: The graphics card, also known as the GPU, is responsible for rendering images and video on the computer screen.
  • Power supply: The power supply converts AC power from an outlet into DC power that can be used by the PC.
Components of a PC
Components of a PC

Types of PCs – What is a PC

There are several different types of PCs, each with its own advantages and disadvantages. Some of the most common types of PCs include:

1. Desktop PCs

Desktop PCs are typically larger and more powerful than other types of PCs. They usually consist of a case that contains the internal components, such as the CPU, RAM, storage, and motherboard. Desktop PCs are ideal for people who need high performance and want to customize their computer with specific hardware components.

2. Laptop PCs

Laptop PCs, also known as notebooks, are portable computers that combine all the necessary components into a single device. Laptops are designed for mobility and convenience, making them ideal for people who need to work or study on-the-go. They typically include a built-in screen, keyboard, touchpad, and battery.

3. Tablets

Tablets are mobile devices that are smaller and lighter than laptops. They are designed for ease of use and portability, with touchscreens and virtual keyboards. Tablets typically run on a mobile operating system, such as Android or iOS, and have access to a variety of apps and online services.

Evolution of PCs

PCs have evolved significantly since their inception in the 1970s. Early PCs were large and expensive, with limited processing power and memory. However, advances in technology have led to smaller and more powerful computers that are now an essential part of daily life.

Evolution of PCs
Evolution of PCs

One of the most significant developments in PC technology has been the internet. The development of web browsers and online services has allowed users to access information and communicate with others from anywhere in the world. The rise of cloud computing has also changed the way we use PCs, with users able to store and access files and data remotely.

PCs have also become more user-friendly over time, with the development of graphical user interfaces and user-friendly operating systems. Windows, Mac OS, and Linux are some of the most popular operating systems used by PCs today. These operating systems provide users with a graphical interface and a range of tools and applications to make computing tasks easier.

Uses of PCs

PCs are used for a variety of purposes, including:

  1. Work: PCs are essential tools for many types of work, from office tasks to graphic design, programming, and data analysis.
  2. Communication: PCs are used for communication, such as email, video conferencing, and instant messaging. Social media platforms and online forums are also popular ways to connect with others using a PC.
  3. Entertainment: PCs are used for entertainment, including gaming, streaming movies and TV shows, and listening to music.
  4. Education: PCs are used in education for research, writing papers, and accessing online learning resources.

What is a PC – Security and Maintenance

Like any technology, PCs require regular maintenance and updates to ensure they continue to function properly and remain secure. Regular software updates, antivirus software, and firewalls are important for protecting your PC from malware and cyber attacks.

Cleaning your PC regularly, both inside and out, can also help to prevent dust and debris from clogging up the internal components and causing damage.

What is a PC – Conclusion

In conclusion, personal computers are an essential tool for modern life, used for work, communication, entertainment, and education. PCs consist of several key components, and there are several different types of PCs to choose from, depending on your needs. With regular maintenance and updates, PCs can provide years of reliable service and improve productivity and efficiency in many areas of life.

Future of PCs

The future of PCs is always an interesting topic of discussion. With the rapid advancements in technology, we can expect PCs to become even more powerful and versatile in the future. Some potential developments in the world of PCs include:

  1. Increased portability: As technology continues to shrink, we can expect PCs to become even more portable and lightweight, with longer battery life.
  2. Artificial Intelligence: PCs may also become smarter and more intuitive, thanks to the integration of AI and machine learning technologies.
  3. Virtual and Augmented Reality: Virtual and augmented reality technologies are becoming increasingly popular, and we can expect to see PCs becoming even more capable of running these immersive applications in the future.
  4. Quantum Computing: Quantum computing is still in its early stages, but it has the potential to revolutionize the way we process and store data. PCs may eventually incorporate quantum computing technologies, offering unprecedented processing power and speed.

Conclusion

In summary, PCs have come a long way since their early days in the 1970s, evolving into an essential tool for work, communication, entertainment, and education. With regular maintenance and updates, PCs can provide reliable and efficient service for years to come. Looking to the future, we can expect PCs to become even more powerful and versatile, incorporating technologies such as AI, virtual and augmented reality, and quantum computing. The possibilities for PCs are endless, and it’s exciting to see what the future holds.